Your “How-To” Guide to using the new SS Trail Map

link to map
On web
On mobile

Whichever platform you’re using, remember these 3 things determines which terrain package you can access:

Guest Ski Level + SS Program + Instructors Steeps Cert

Click here to remind yourself of the programs & terrain packages

Don’t have data and but still want to access the maps? Download areas and levels as PDFs and save them directly on your phone!

Using a computer?

Moving around the map:

Using only your mouse:

  • Click and drag to move left, right, up & down

  • Right click and hold to rotate the map

  • Double click or scroll to zoom

    (You can also use the + & - icons in the bottom corner to zoom)

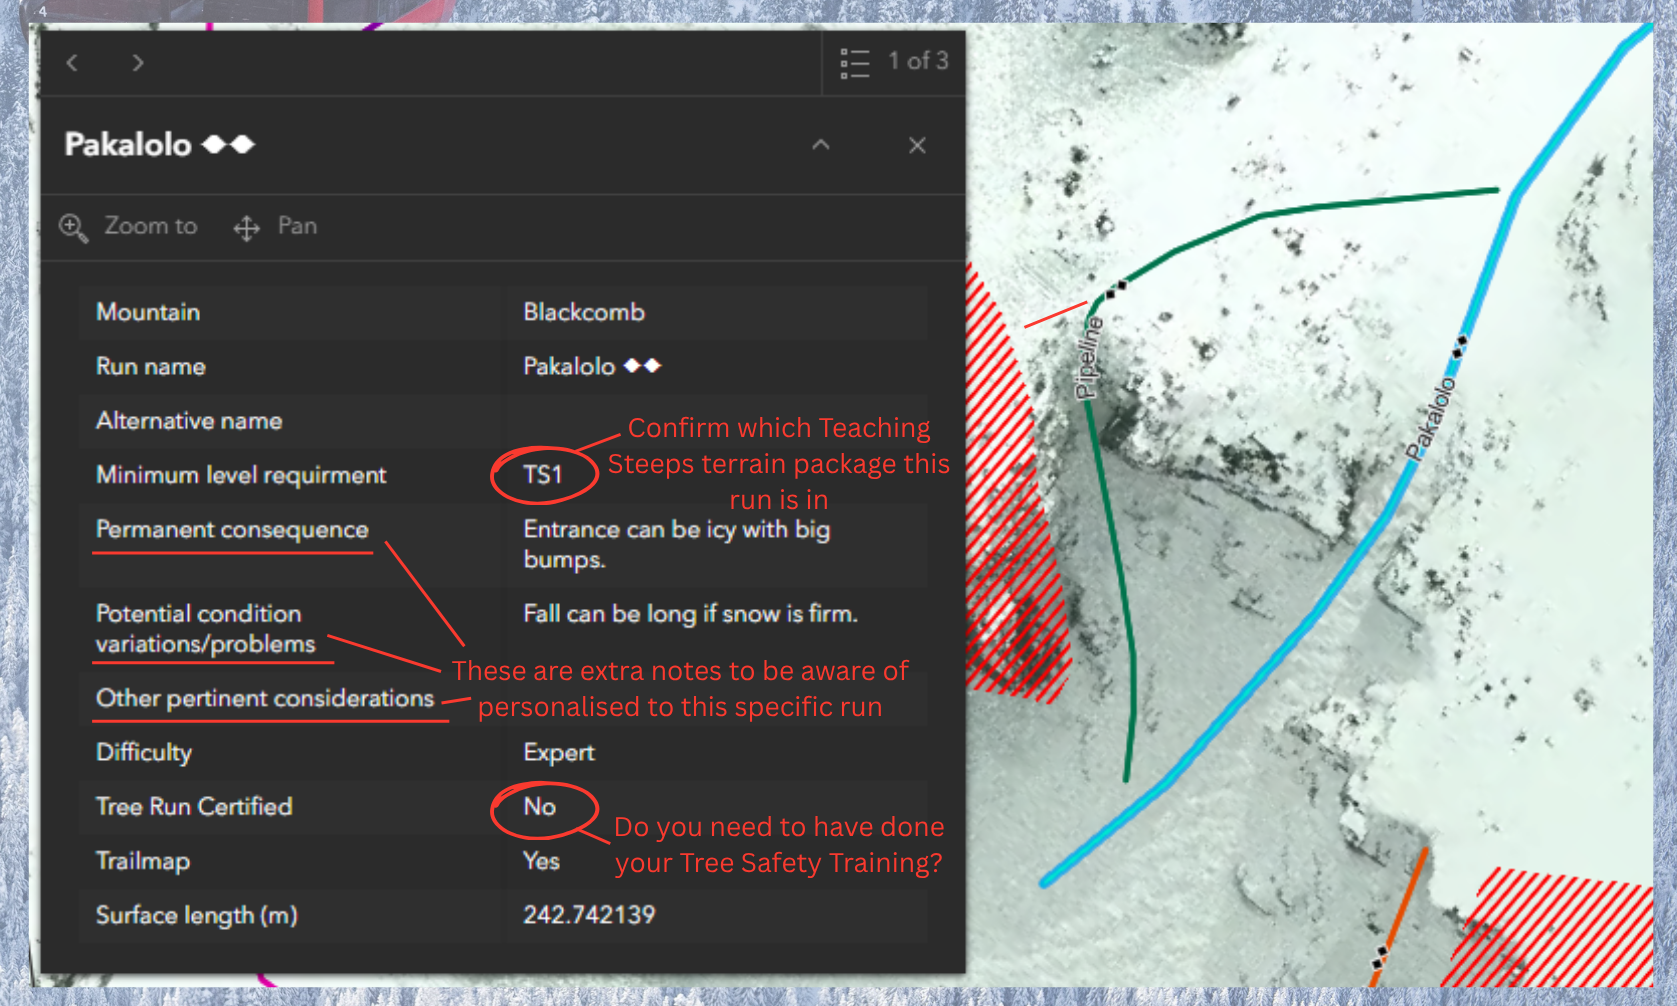
  • Single click on a run to read more about it

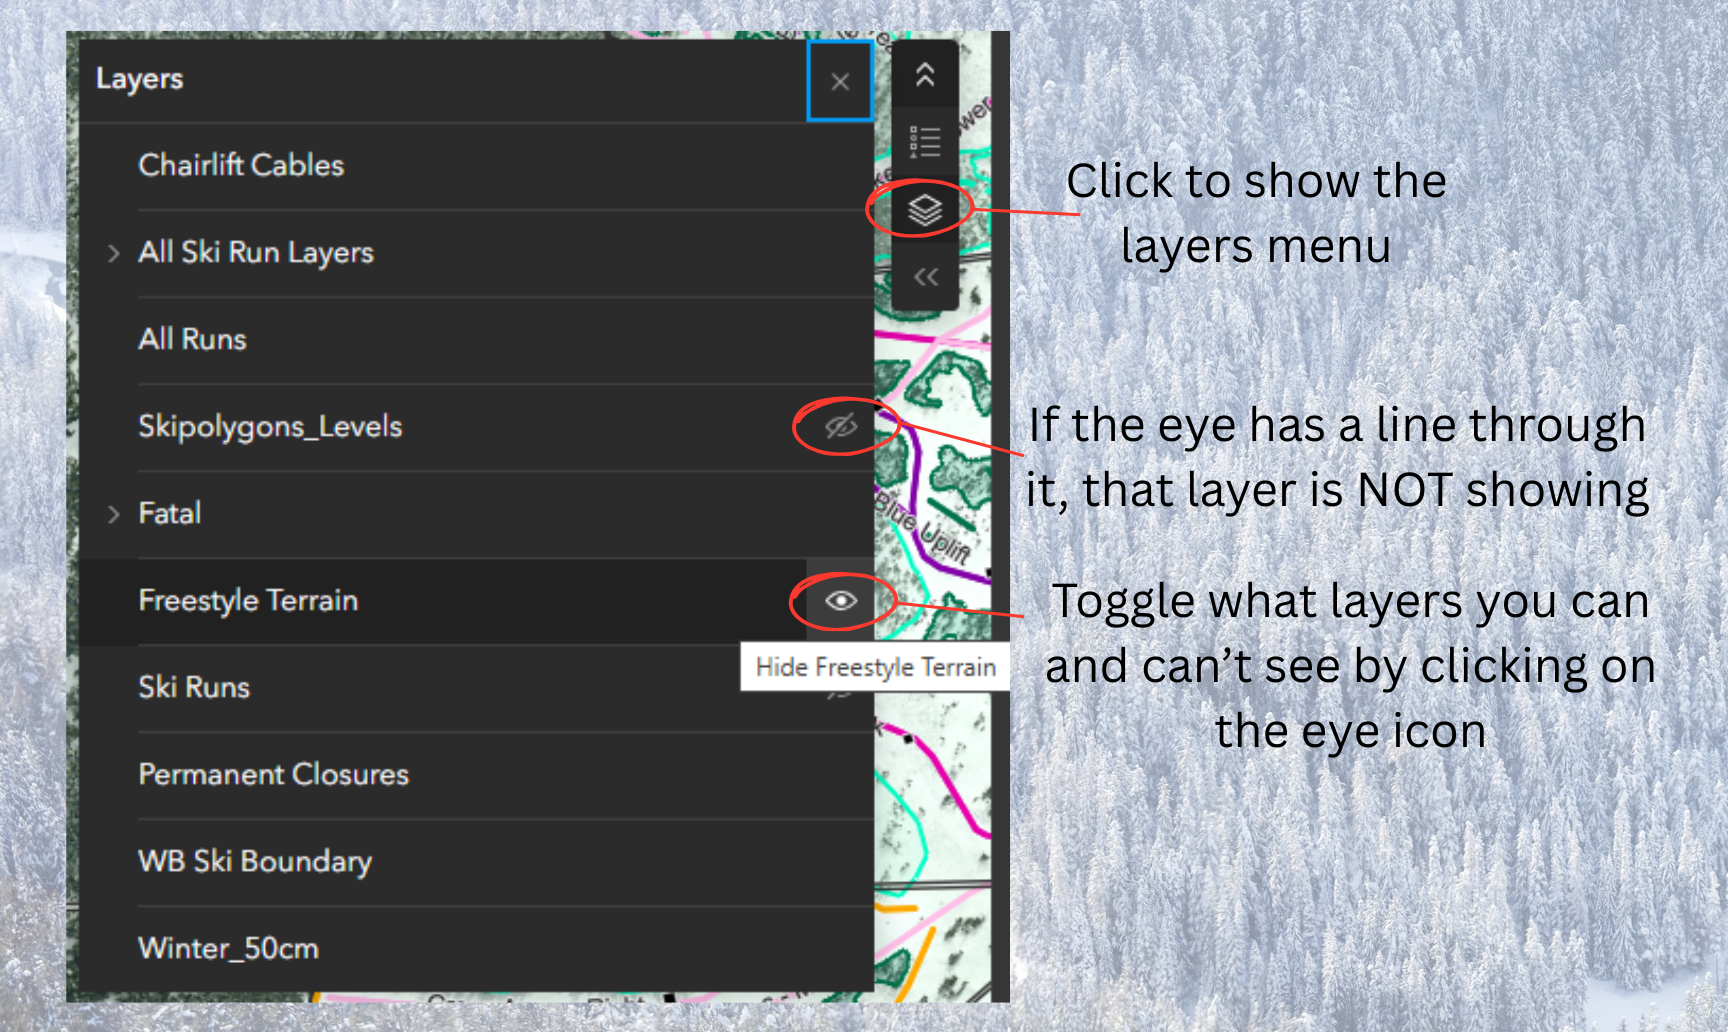
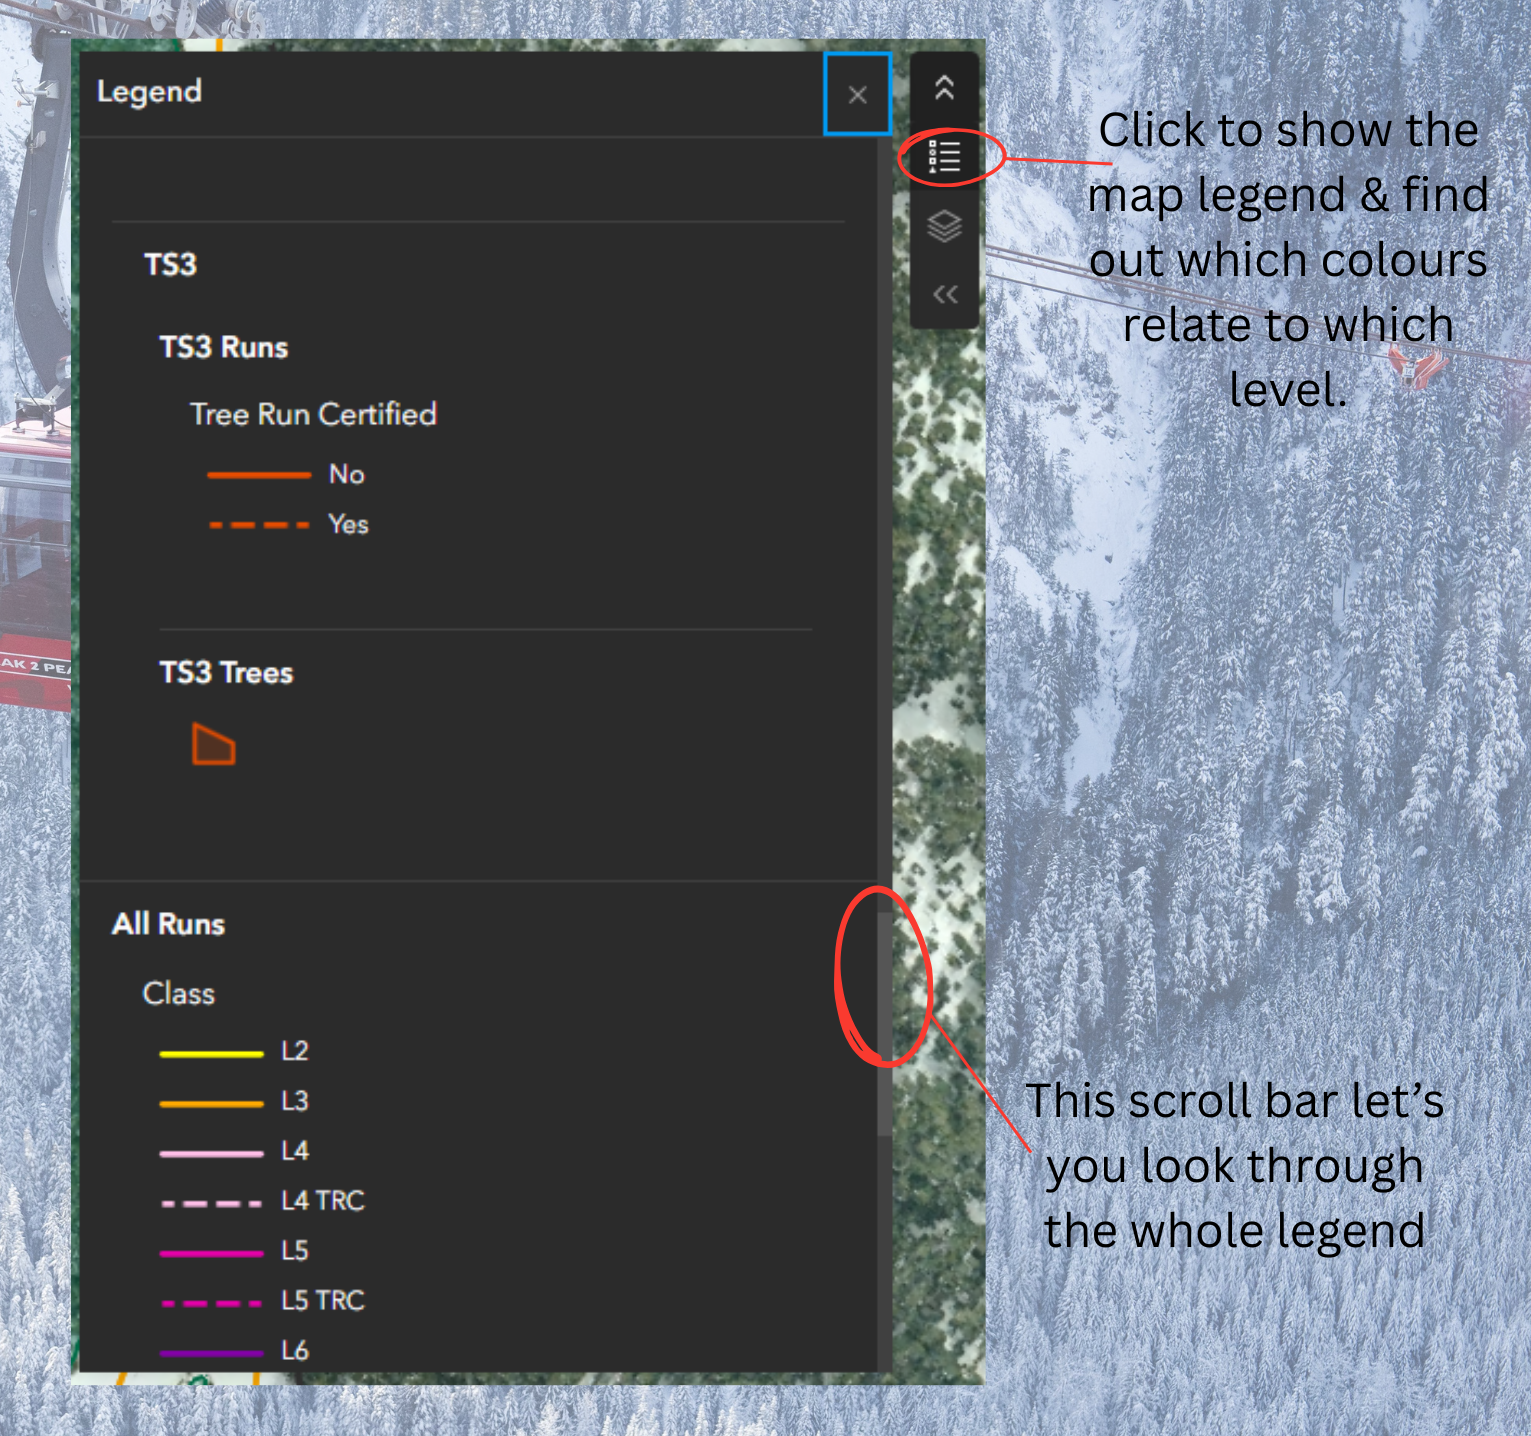
  • Use the mouse to find the layers and legend menus

  • The small circle icon allows you to find your location (if location services are enabled)

Instructions overlay on a snowy forest background, showing icons for map, location, zoom in, and zoom out.
Screenshot of a map with a sidebar menu titled 'Layers.' The menu lists various map layers such as 'Chairlift Cables,' 'All Ski Run Layers,' 'All Runs,' 'Skipolygons_Levels,' 'Fatal,' 'Freestyle Terrain,' 'Ski Runs,' 'Permanent Closures,' 'WB Ski Boundary,' and 'Winter_50cm.' A blue icon with layers is circled with red, indicating where to click to show the layers menu. Additional icons include an eye symbol, which is used to toggle the visibility of map layers, and an eye with a slash through it indicating a hidden layer. The background is a snowy forest scene.
A map legend with controls and instructions on the side. The legend includes categories for TS3 runs, TS3 trees, and all runs classified by different color codes and line styles. The image also shows a scroll bar beside the legend, with instructions indicating it allows viewing the entire legend.
A digital map overlay of the Pakalolo mountain trail shows a topographic view with colored lines representing the trail and features. An info panel details the mountain's name, run code, minimum level requirement marked as 'TS1', and notes on terrain, conditions, difficulty rated as 'Expert,' and tree run certification status marked as 'No.' Annotations in red indicate areas to confirm the terrain's classification and safety training requirements.

Using your phone?

Moving around the map:

Using your fingers:

  • touch and drag to move left, right, up & down

  • By using two fingers you can rotate the map

  • Double click or pinch in/out to zoom

    (You can also use the + & - icons in the bottom corner to zoom)

  • Single tap on a run to read more about it

  • Single tap to find the layers and legend menus

  • The small circle icon allows you to find your location (if location services are enabled)

Instructions on how to use map features, including a compass icon, a crosshair icon, and plus and minus zoom buttons, over a background of a snowy forest.
Screenshot of a map legend with categories for different map elements such as TS3 runs, TS3 trees, and all runs, with color-coded symbols and lines indicating various levels and certifications. An instructional overlay explains how to use the map legend and scroll bar to view different layers.
Screenshot of a map layer menu with options for ski terrain; guide instructions on toggling layers, showing/hiding layers using icons and lines.
Screenshot of a digital trail map showing several horse shoe trails numbered 3 through 7, with detailed information about horse shoe trail 7 including mountain, whistler, minimum level requirement, and other notes, with annotations pointing out where to scroll and details about the terrain package.
Map of ski trail system titled SS Trail Map with labeled trails such as Monday PM, Monday, Cockalorum, Stepan's Chute, Lox Chute, Cream Cheese Ridge, Bagel Roll, and Bagel Bowl. The map shows snow-covered terrain with ski trails marked by lines of different colors. A blue dot indicates a person's location with a label pointing to it that says "You are here!" A vertical toolbar on the right side includes a location button with a target icon and a plus/minus zoom control. The bottom shows website URL wbmountain.maps.arcgis.com.
Screenshot of a trail map from wbmountain.maps.arcgis.com with a current location marked by a blue dot. A pop-up window shows GPS coordinates, altitude, accuracy, and timestamp. Text on the right explains that tapping the blue dot reveals more precise location information.

General Tips & Tricks

  • Hide or turning off the “Ski Runs” and “Skipolygons_Levels” layer and try again

  • Ensure the menu for these is expanded. You can tell by whether the arrows are pointing up (menu open, click to hide) or pointing down (menu closed, click to open)

  • Check your location settings and ensure that your web browser is allowed to view your location

  • If you rotate the map to a North-South orientation (quickest by pressing the compass button) you can work out which aspects face which way.

    This is a great tool to use when the conditions are effecting certain aspects eg “grippy chalky snow on N aspects” or “fun spring slush on S facing slopes”.

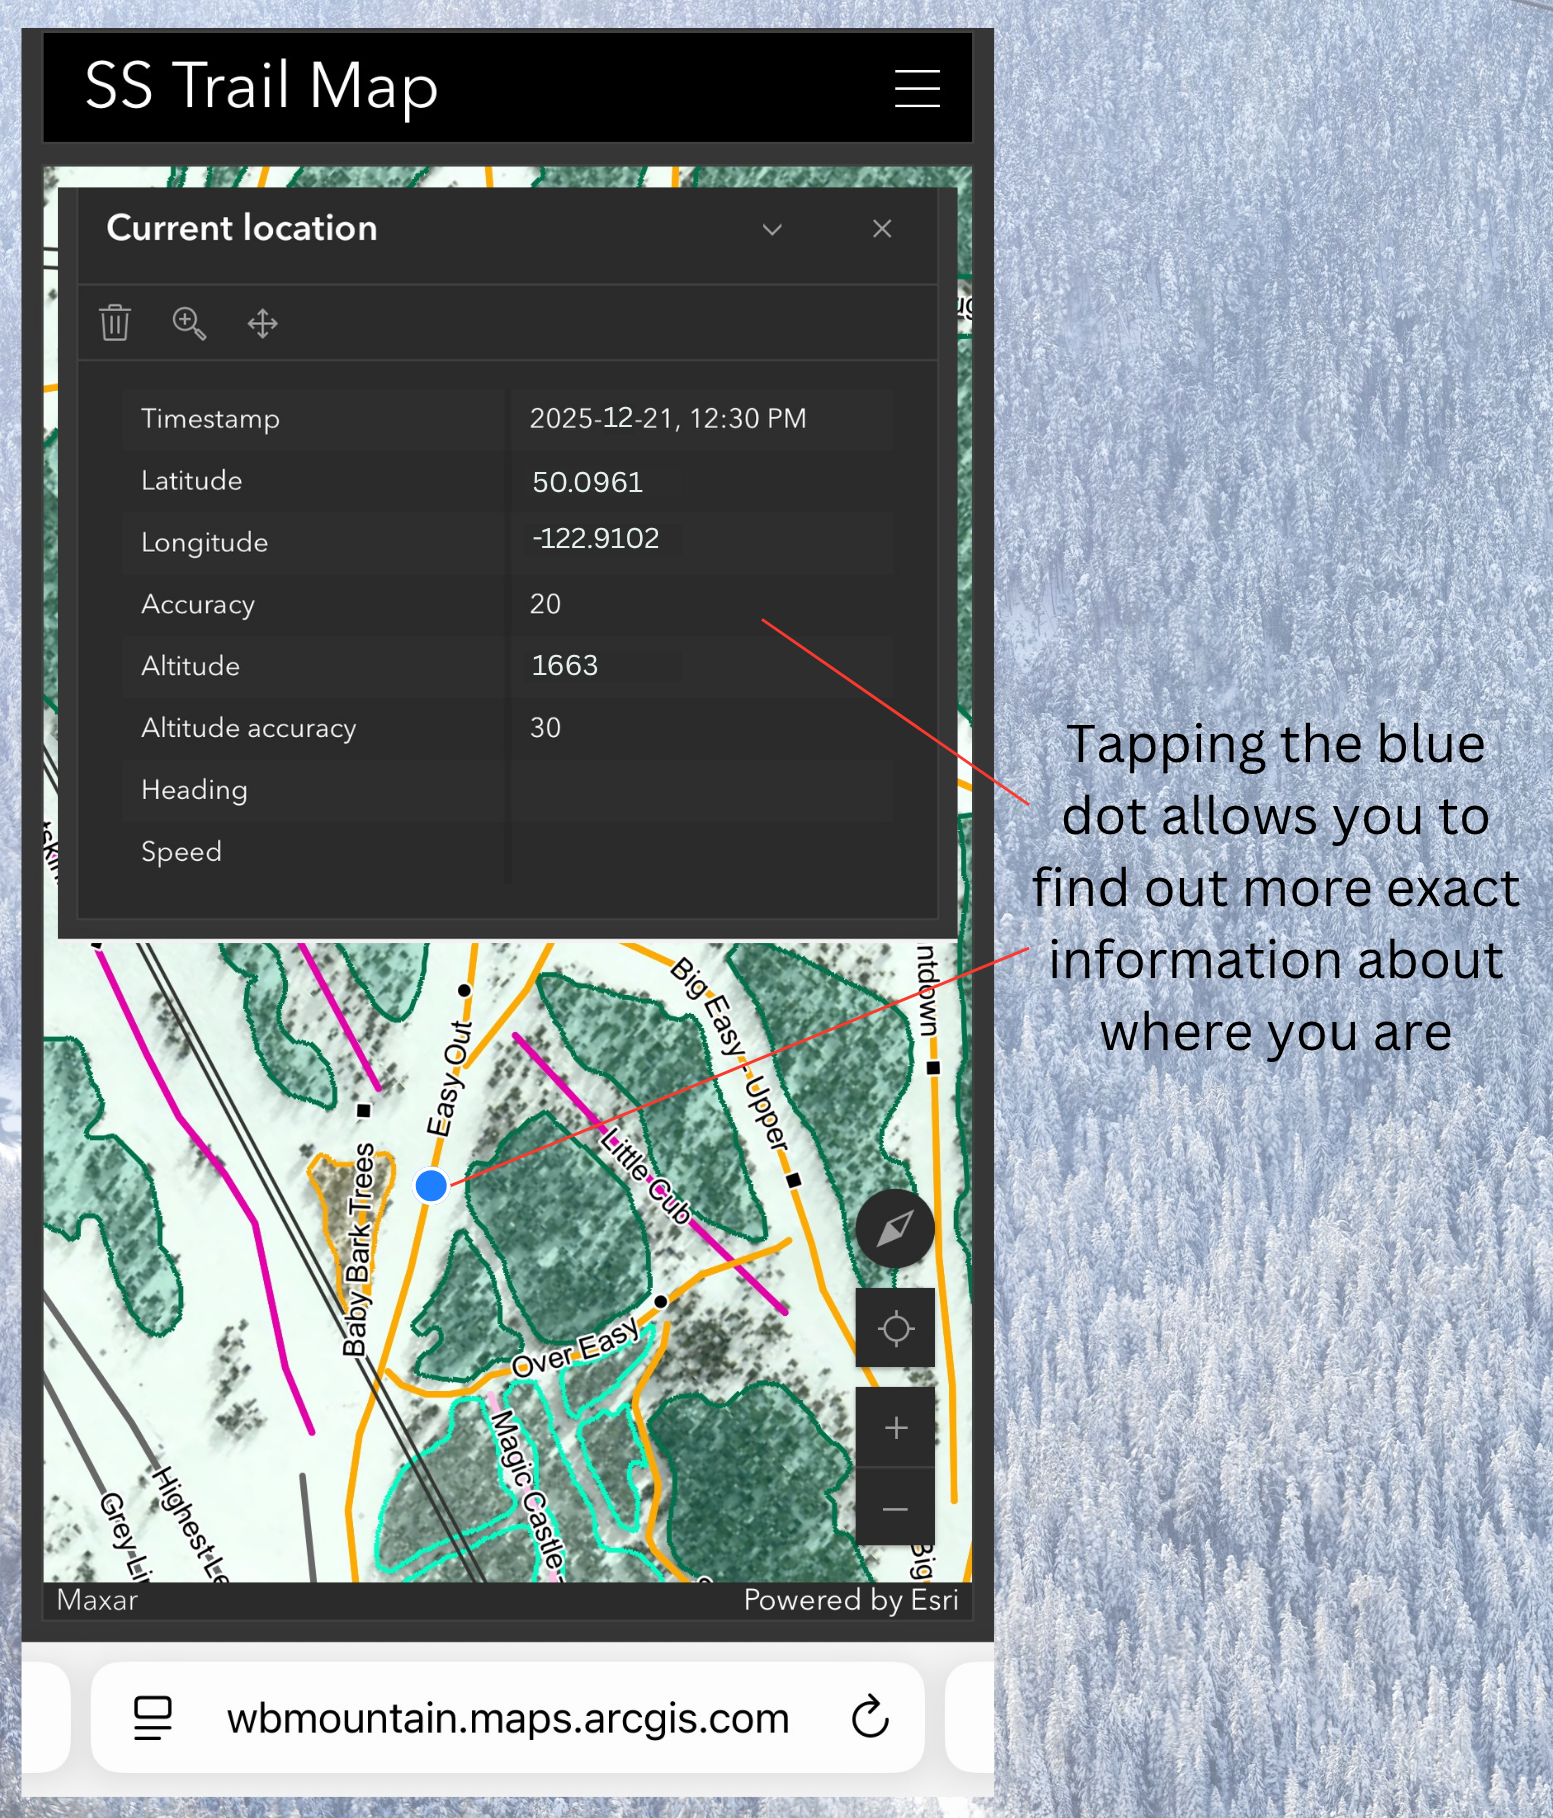
  • If you don’t have a flaik, you can use the GPS locator to find out exactly where you are. Either describe the runs and intersections you are close to, or tap on the blue dot and it will bring up your GPS coordinates.